Solutions


Partnership with NiftyImages partnership
Updated May 15th, 2025 by AddEvent

Today we’re thrilled to announce a new partnership with NiftyImages! NiftyImages is a growing technology company located in Sacramento, CA that provides real-time personalization for email campaigns.
A market-leader in this space, NiftyImages offers its’ customers the ability to integrate dynamic content into their email campaigns, including:
- Personalized images that change based upon the recipient’s name (or any other data)
- Customizable countdown timers that update every time a user re-opens the email
- Live social media feeds with collages that update every 15 minutes to display new content
- The ability to change images and text even after email campaigns have been deployed.
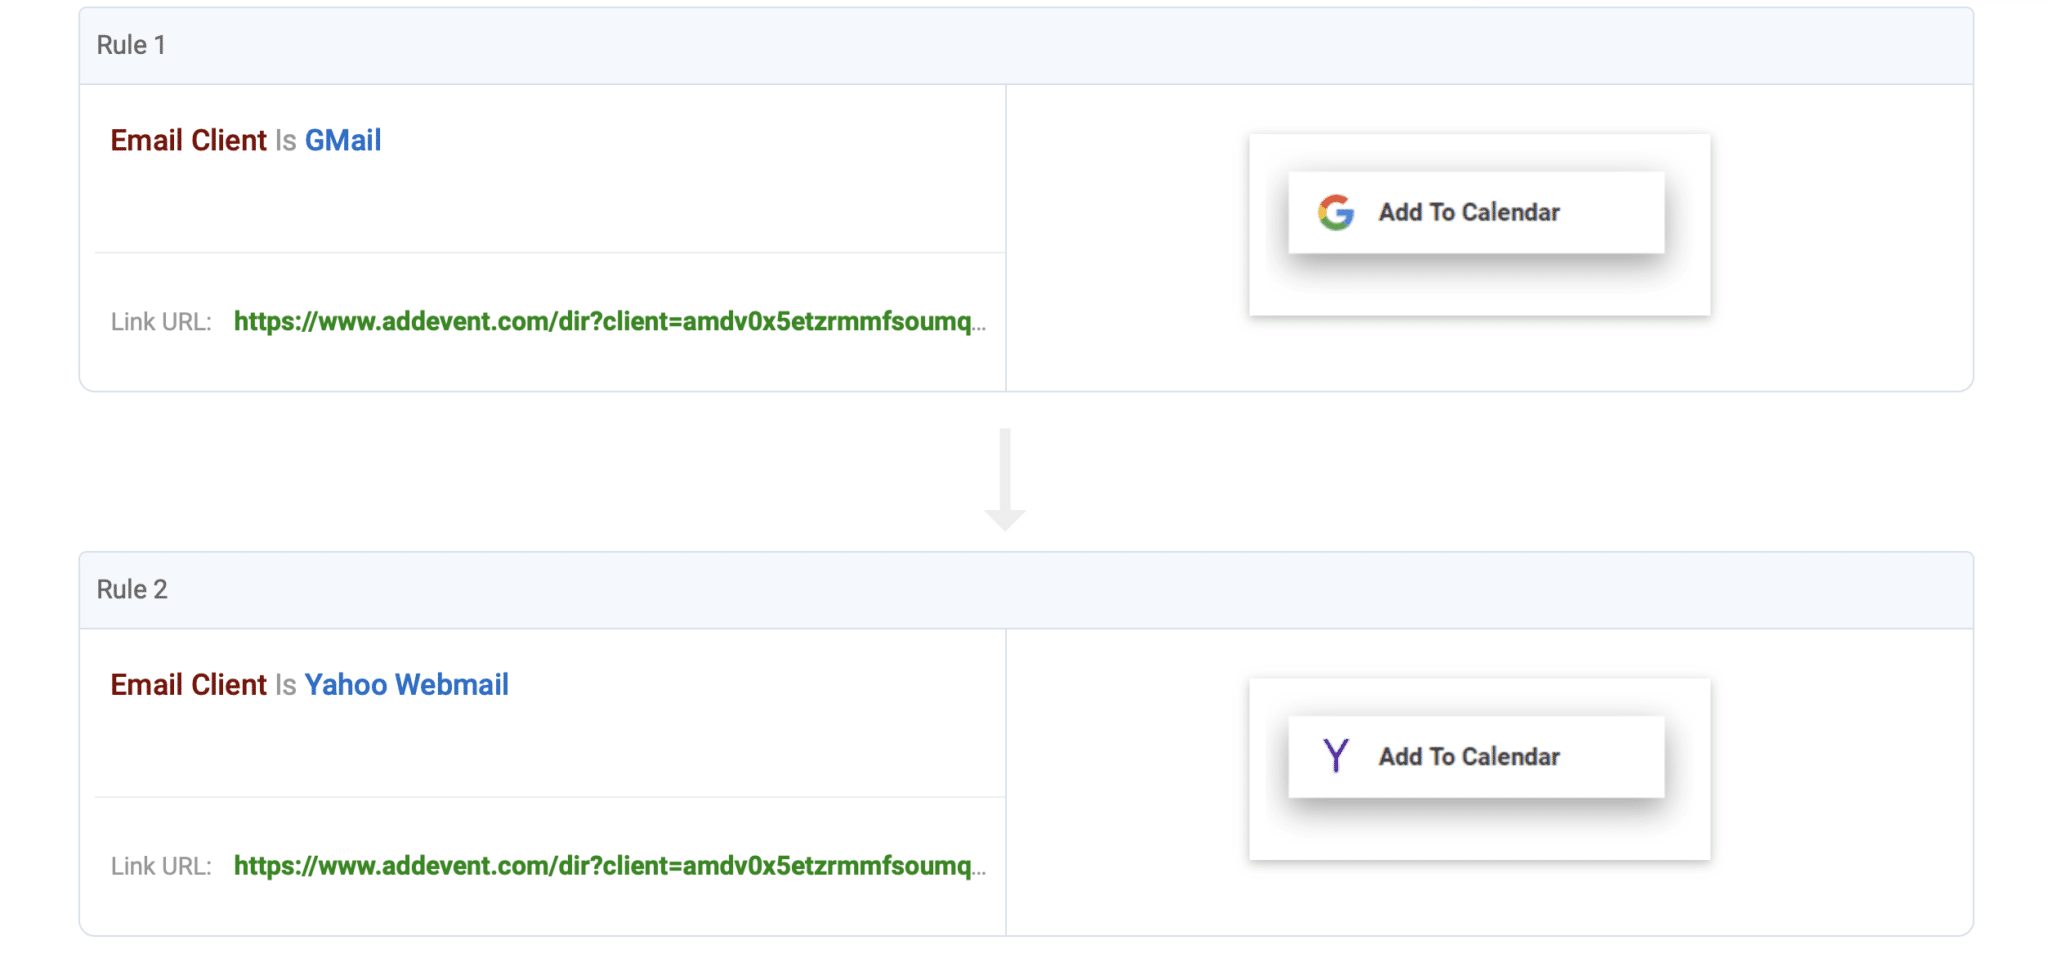
With the new AddEvent-NiftyImages integration, NiftyImages customers will now be able to use AddEvent’s Add to Calendar Buttons in their email campaigns! The integration allows users to create a rule-set that detects the email client of the email recipient. It will then display the appropriate add-to-calendar button for that recipient in their email, based upon the email client that was detected.
No coding knowledge is required. We make it easy to give your recipients a quick and effortless way to add your events to their calendars. The remainder of this article will illustrate how to use the integration.
How to Integrate NiftyImages and AddEvent
1. Create a NiftyImages account
To begin, sign up for a NiftyImages account. When you have done this, navigate to the AddEvent integration.

2. Acquire an AddEvent Client ID
When you open the AddEvent integration, you will need to enter your AddEvent Client ID in order for the add to calendar functionality to work. To do so, click the blue Account link as shown in the image below.

You will be redirected to AddEvent.com, where you will need to purchase an AddEvent account. Your account will have a Client ID that you can find in the “Account ID and API Token” section of your Account page.
Copy the client ID, navigate back to NiftyImages.com, and paste it into the Client ID box as shown in the image above.
3. Create your event and test the add to calendar links!
Once you add the AddEvent Client ID, your AddEvent-NiftyImages integration will be fully functional!
Enter the date, time and event details into the forms provided and click the pink Test Calendar Invite button.
Ready to Go!
Your add to calendar links are fully functional and you can now integrate them into your email campaigns! The integration will detect the email client that each of your email recipients are using and will display the appropriate add to calendar button for that recipient in their email based upon the email client that was detected.
FAQs
What is the AddEvent + NiftyImages integration?
It’s a new integration that allows NiftyImages users to embed Add to Calendar buttons directly into personalized emails. These buttons are intelligently tailored based on the recipient’s email client to ensure compatibility and a seamless experience.
Where do I find my AddEvent Client ID?
Log into your AddEvent account, then navigate to your Account page. Under “Account ID and API Token,” you’ll find your Client ID. Copy and paste that into the integration panel on NiftyImages.
Can I test the Add to Calendar functionality before sending my email campaign?
Yes! NiftyImages provides a “Test Calendar Invite” button so you can preview how the AddEvent buttons will function within your email before launching your campaign.